
Hi Everyone!
After a short hiatus we’re back! A lot’s happened since the Swanson’s tied the knot and it took quite a bit of time to get back into the groove. We so appreciate everyone who’s stuck with us through this short break! We’ve got lots of fun things in the works for the future, so let’s get it started with some fun summer projects!
DIY – Backyard Pallet Furniture on a Budget:
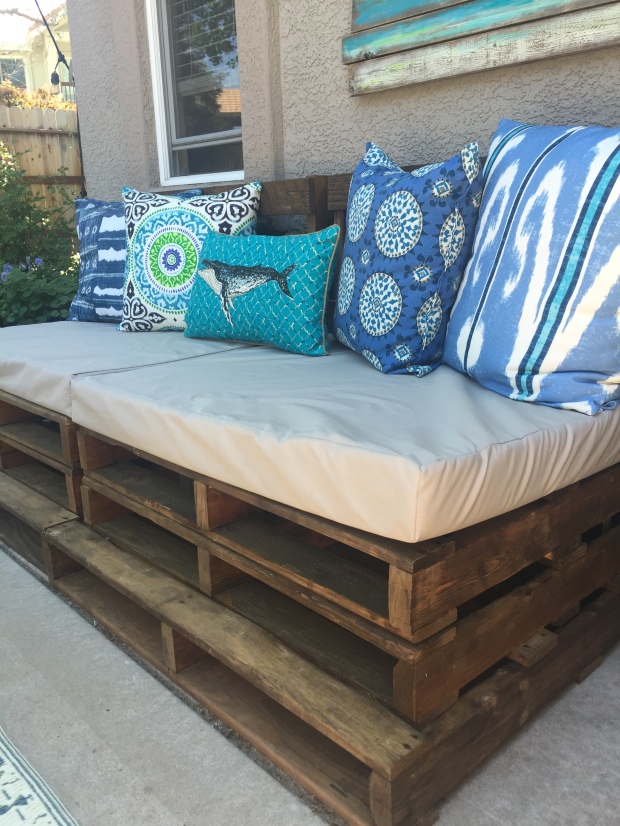
With summer in full swing we needed to get it together and create an outdoor space to enjoy the weather. With patio furniture being WAY out of budget, we decided to make our own! And what better way than to utilize pallets. They’re cheap, easy to work with and if something doesn’t work out then you have wood to use for any future projects as well.
To start we collected as MANY pallets as we could find! You can ask warehouses, Home Depot, hunt them down in Mall dump areas and anywhere else that orders products in bulk. We used a total of 13 Pallets for this project. We were fortunate enough to get most all of them in pretty good condition and the same size.
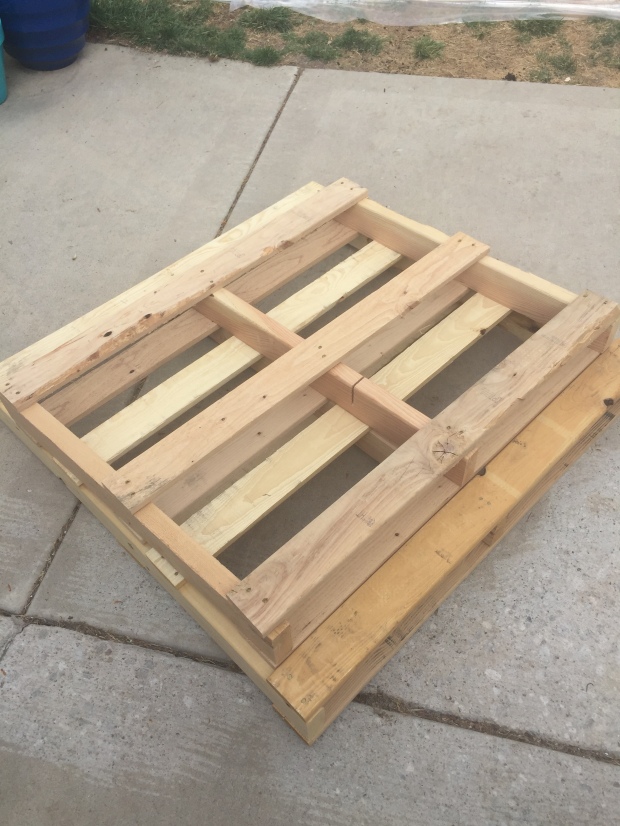
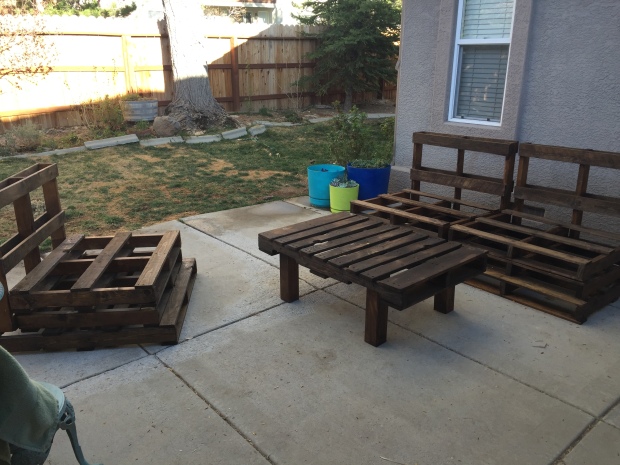
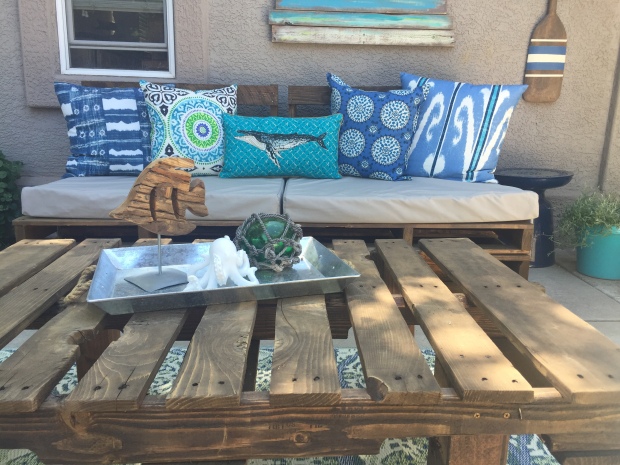
After gathering the pallets we experimented around to decide on the layout we wanted. We decided on 3 separate chairs & one middle table. (We pushed two of the chairs together in the picture below to make a large couch. This way we could pull it apart to separate it if we wanted.) We ended up using a total of 4 pallets per couch. 3 for the base, and one for the back. In the picture below we show 5, but we ended up moving two of the pallets from the couch layout onto the single chair.
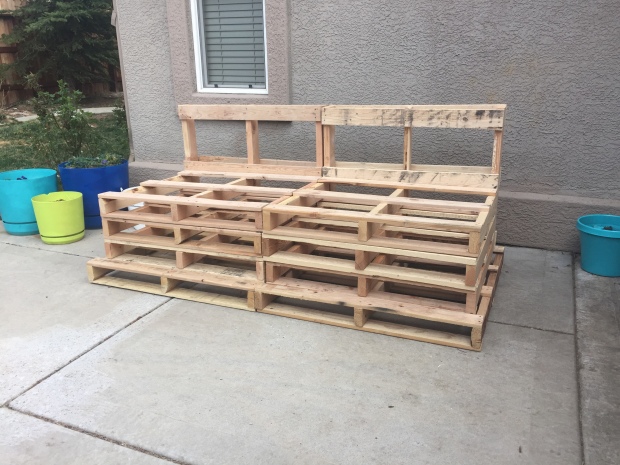
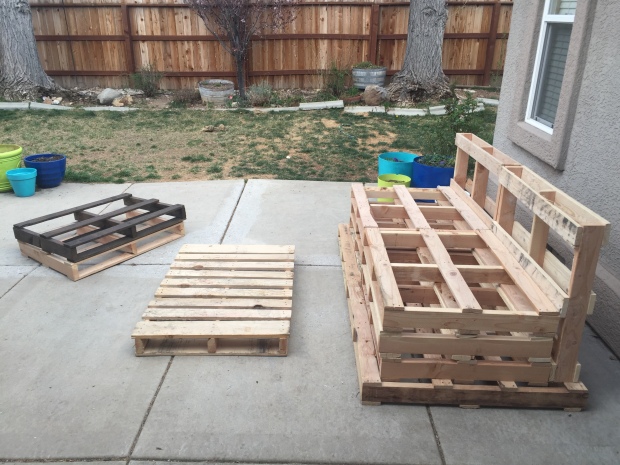
Next we needed to put together our table. We used the largest pallet that had the wood slats closest together. All we needed to do was add the legs! We went to Home Depot and got one square post of wood in the thickness that we wanted and had them cut it down to 4 individual 7″ pieces. (We guestimated a lot on the height but it ended up working out!)


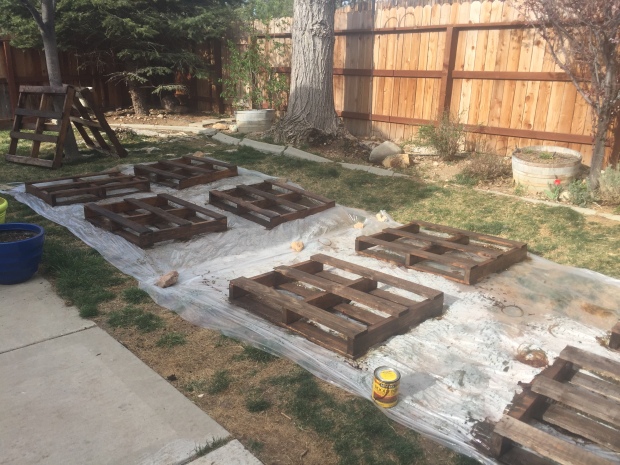
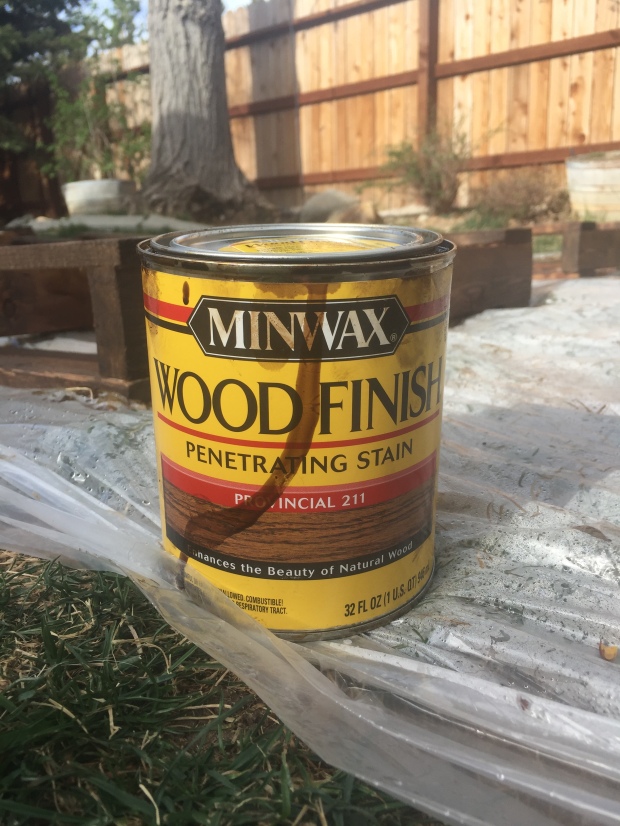
After getting the layout figured then came the color. We used Minwax – Provincial. I’ve tried a variety of stains but Minwax had remained to be my favorite. The colors soak into the wood really well and the can’s aren’t too pricy. It took us a total of 3 cans to stain all the pallets. We stained the front and back of most all the pallets, except for the bottom pieces. Those we just did the wood that was visible…block out a good portion of your day cause this takes some time!
Once we finished staining & set the wood back up in its formation we attached the pallets together. We used a combination of flat & L shape galvanized brackets to attach the bottom & back pieces. You’ll need quite a few L shaped brackets on the inside. The amount of brackets you’ll need will vary depending on the type of pallets you use, and how many pieces you end up attaching. Just make sure its sturdy!

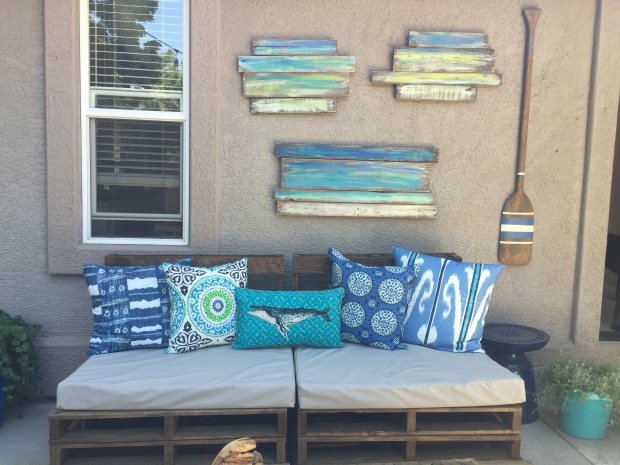
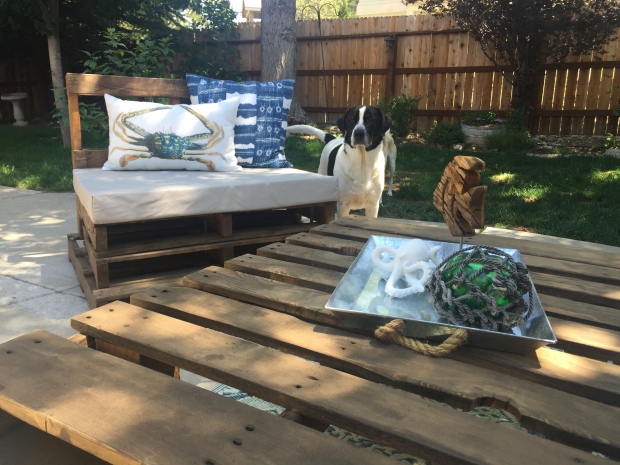
After we finished attaching the wood together it was time to put on the finishing touches! We got our outdoor pillows from TJ Maxx, Marshall’s and Pottery Barn. Our decorative accessories on the table are from mostly World Market. The nice thing about having wood pallets is they can fit any style and match any color! We went for a tropical beach look.
For the cushions: This was the trickiest part since I didn’t want to have to sew the cushions myself. There’s a variety of options since these will most likely have to be custom made. Luckily we have a family member that loves to sew, so we just got her some 4″ dense foam and outdoor fabric and voila! You can also find custom cushions on Etsy, by visiting your local fabric shop or even shopping around at outdoor furniture stores that sell cushions separately.


The cost was super low on this project since the pallets were found, $Free.99 is definitely a favorite! We only had to pay for the stain, brackets, and wood for the table legs. Taking the decor out of the price factor this projects was well under $100. For anyone interested in the painted wood wall art, we’ll have a tutorial for that coming soon! Feel free to send us any questions and comments! Happy DIYing 🙂
Sincerely,
Sugar & Cypress
